Well, if “Number Two” represents a text based label in your Civil 3D drawing; it can work for you! Let me explain.
One of Civil 3D’s biggest strengths are its “scale reactive” labels. Without any effort on our part, all Civil 3D annotations automatically display at a consistent, predictable size regardless of plot scale. In fact, at first glance the only complaint you may lodge against these labels is that they only seem to apply to Civil 3D object data. Wouldn’t it be nice, for instance, if we could make ANY label (or callout) react to changes in scale?
Actually we can. Here’s how…
We’re going to create a custom label style called a Note. The “Note” style allows you to create Civil 3D labels that display any text string you like.
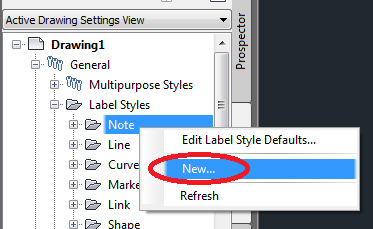
Step 1. On the Settings Tab of the Toolspace, open the “General” category, and inside “Label Styles”, right-click on “Note” and choose New.
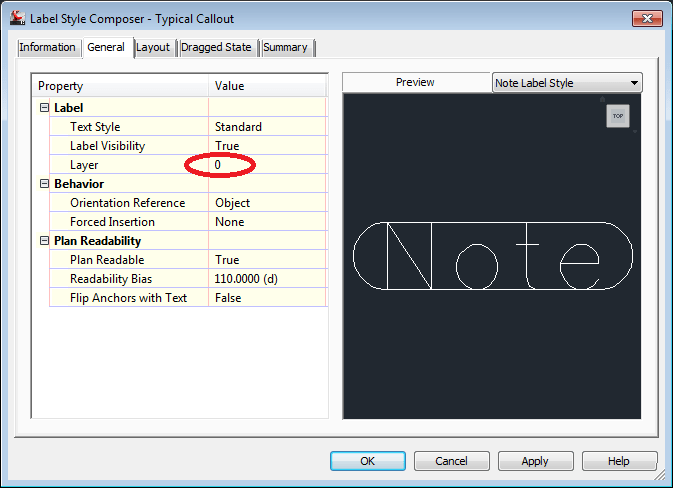
Step 2. In the Label Style Composer, set the Information Tab current and name the style “Typical Callout”.
Step 3. On the General Tab, choose your desired settings. (Personally, I left the layer = 0. By doing so, this label will assume the properties of any layer it’s inserted on.)
Step 4. On the Layout Tab, select your desired text style and height. (In my example, I elected to turn off the extra border.)
Step 5. Finally, on the Dragged State Tab, choose your desired leader settings. When finished, click OK to dismiss the composer.
Now that our custom style is finished, let’s label something. For this example, we’ll assume I’m working on a survey and I need to label a metal shed.
Step 1. On the Ribbon, jump to the Annotation Tab, and click the Add Labels icon.
Step 2. In the Add Labels Dialog Box, make sure “Feature:” and “Label Type:” are both set to Note, AND that you have selected the new label style. Click Add when finished.
Step 3. At the “Pick label location:” prompt, pick a point in the drawing to place the label. (Notice the label comes in appropriately sized for the current plot scale.)
Step 4. To edit the label text, select the label, right-click, and choose Edit Label Text. (You can also select Edit Label Text from the context sensitive Ribbon tab.)

Step 6. (Optional) Drag label to create an automatic leader to your object.
Your results will look similar to the example below…
Notice in all three views we are seeing the same geometry and callout, AND the callout remains consistently sized in each view.


Leave A Comment