Here’s a quick guide to cut a section through Point Clouds in ACAD 2019
1. Make sure your Point Cloud has been converted to an RCP file
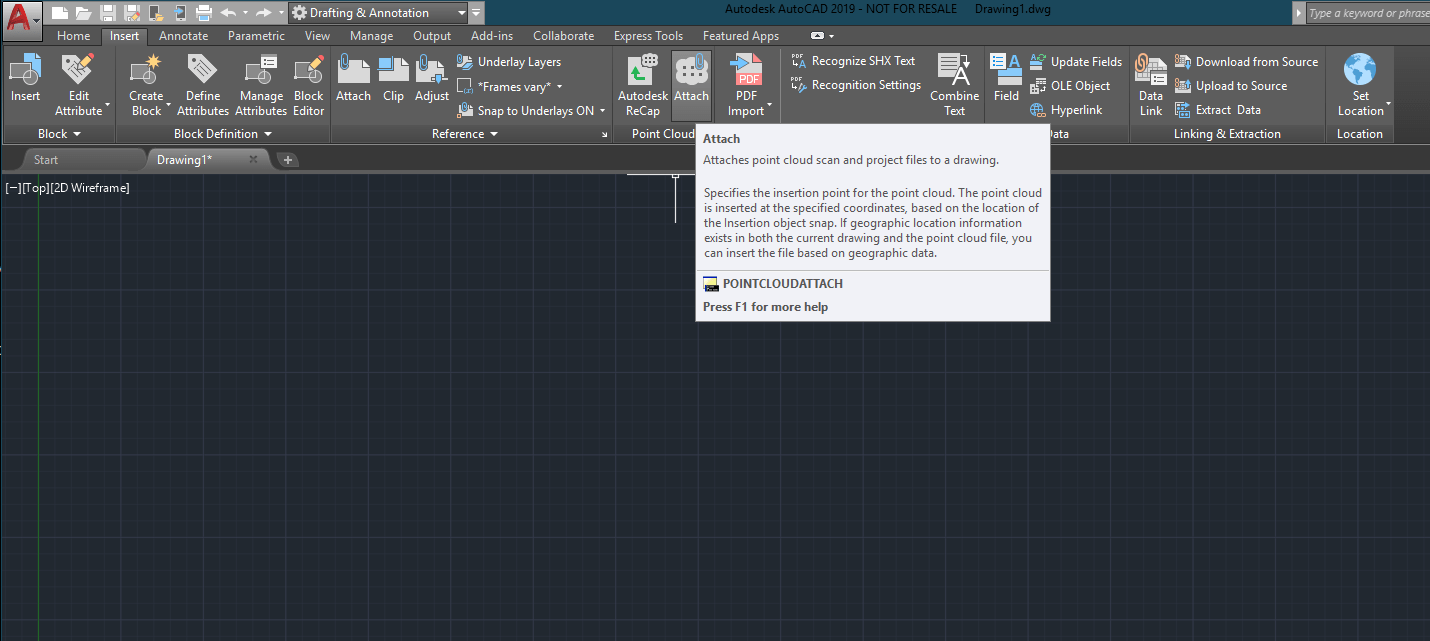
2. Insert tab then Attach button to bring your Point Cloud into ACAD (like in image below)

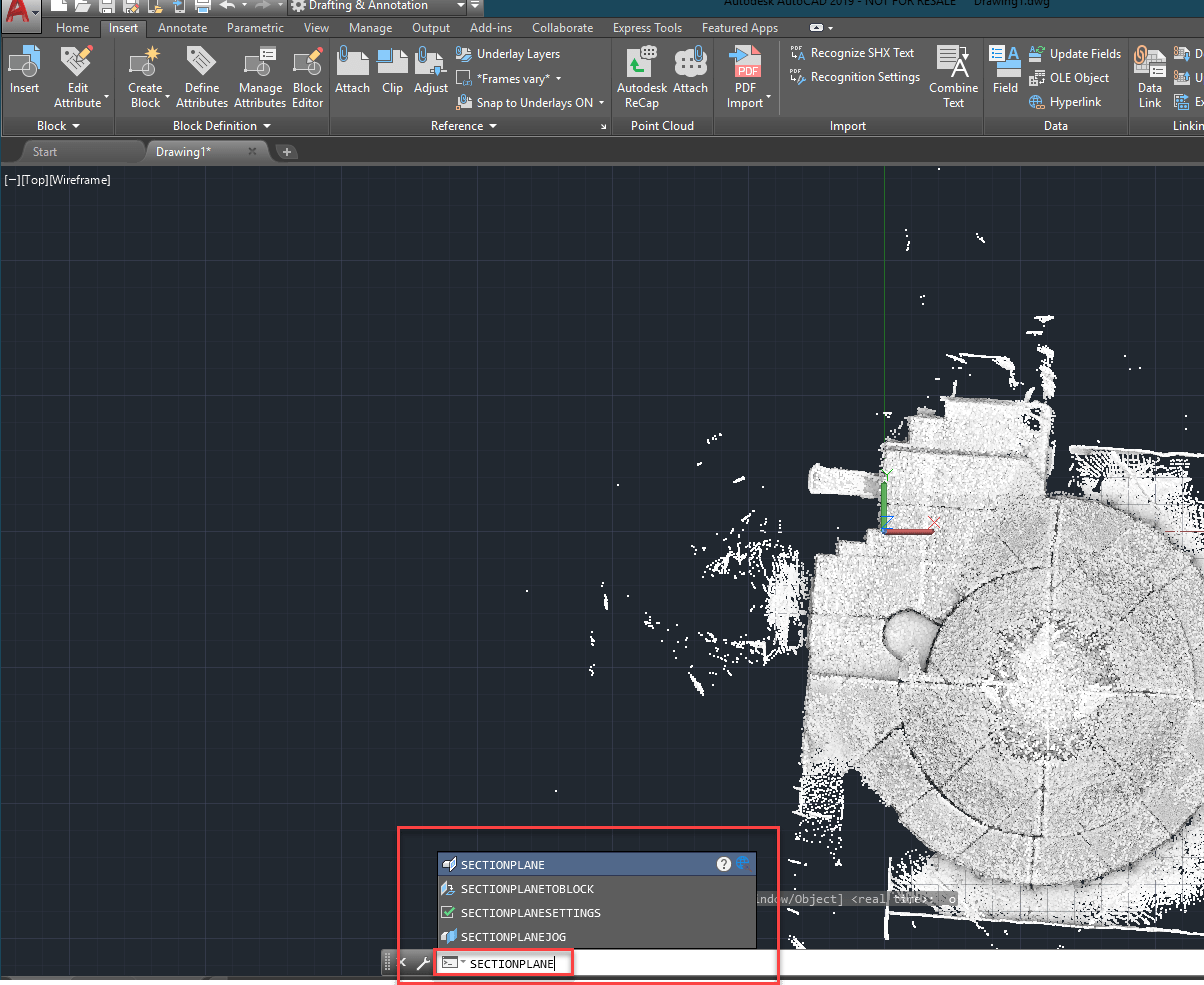
3.Type on your command line (Sectionplane) all one word

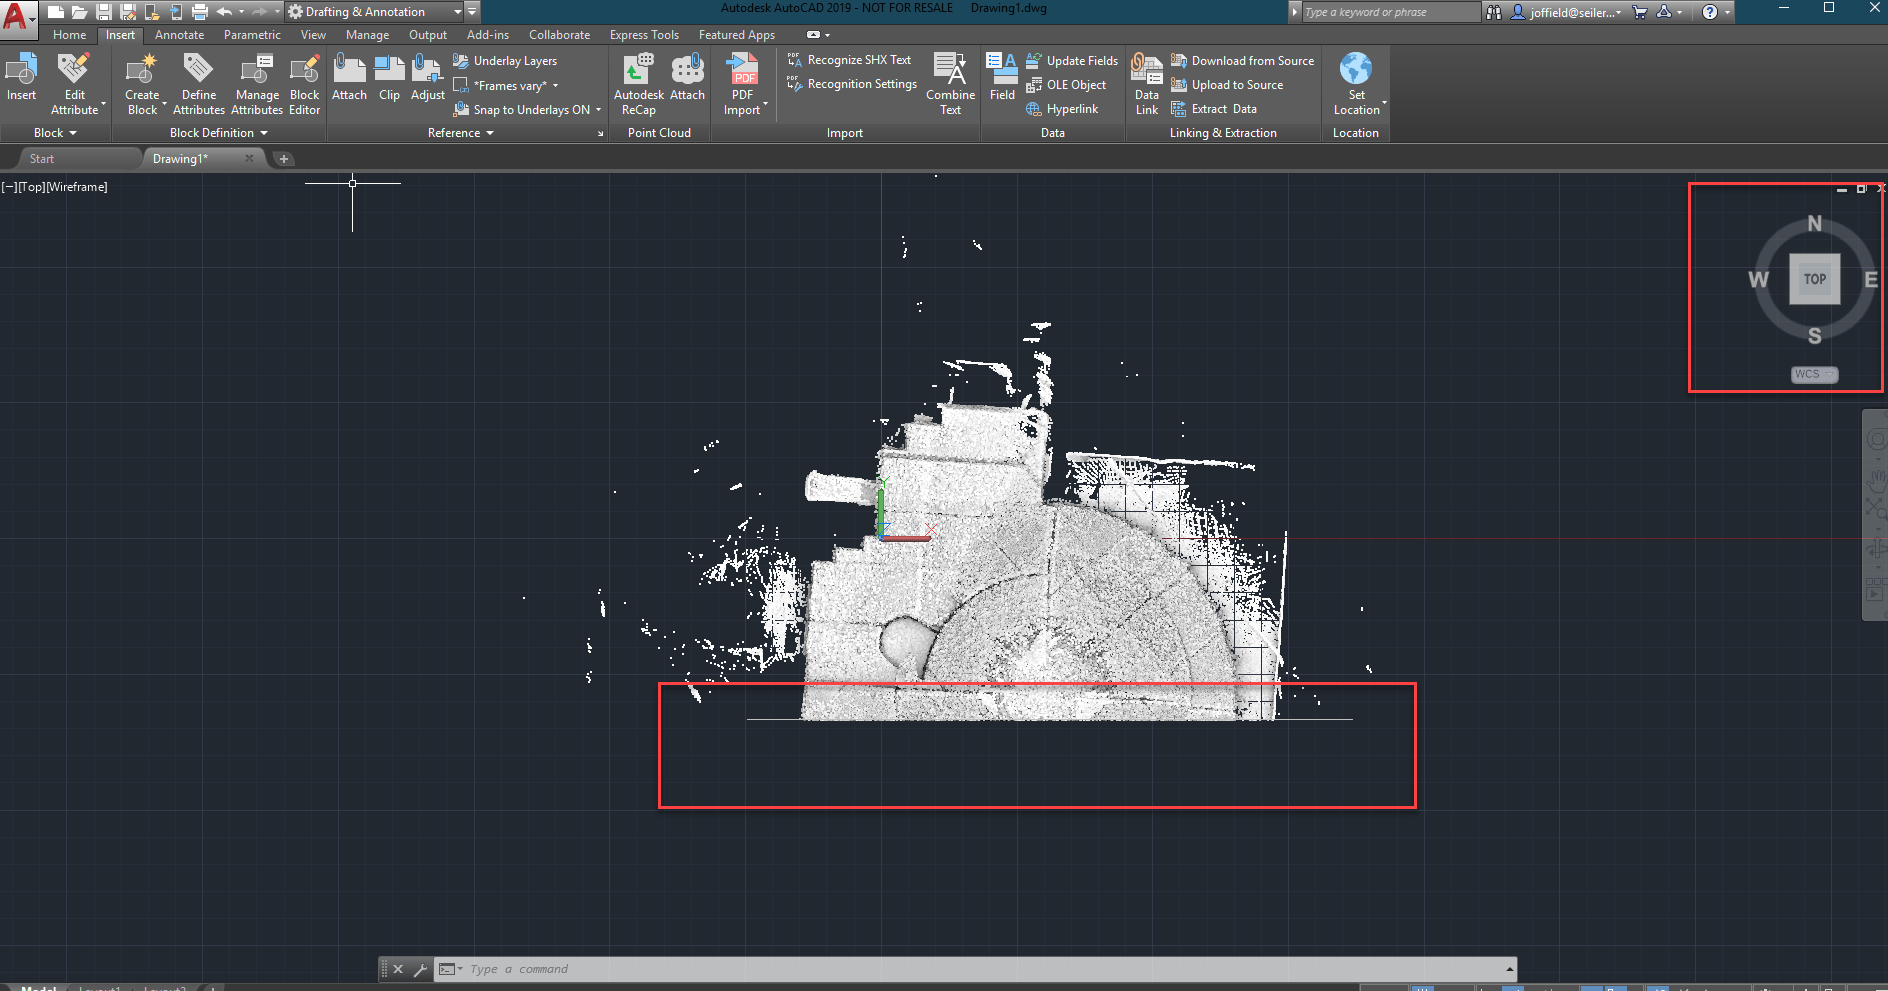
4. Cut your section (left click in the two areas you wish to cut a line / section through) or choose your options prior (see below – either via the command line or right click)

5. Use your ViewCube (top right of ACAD) to position to the cut view

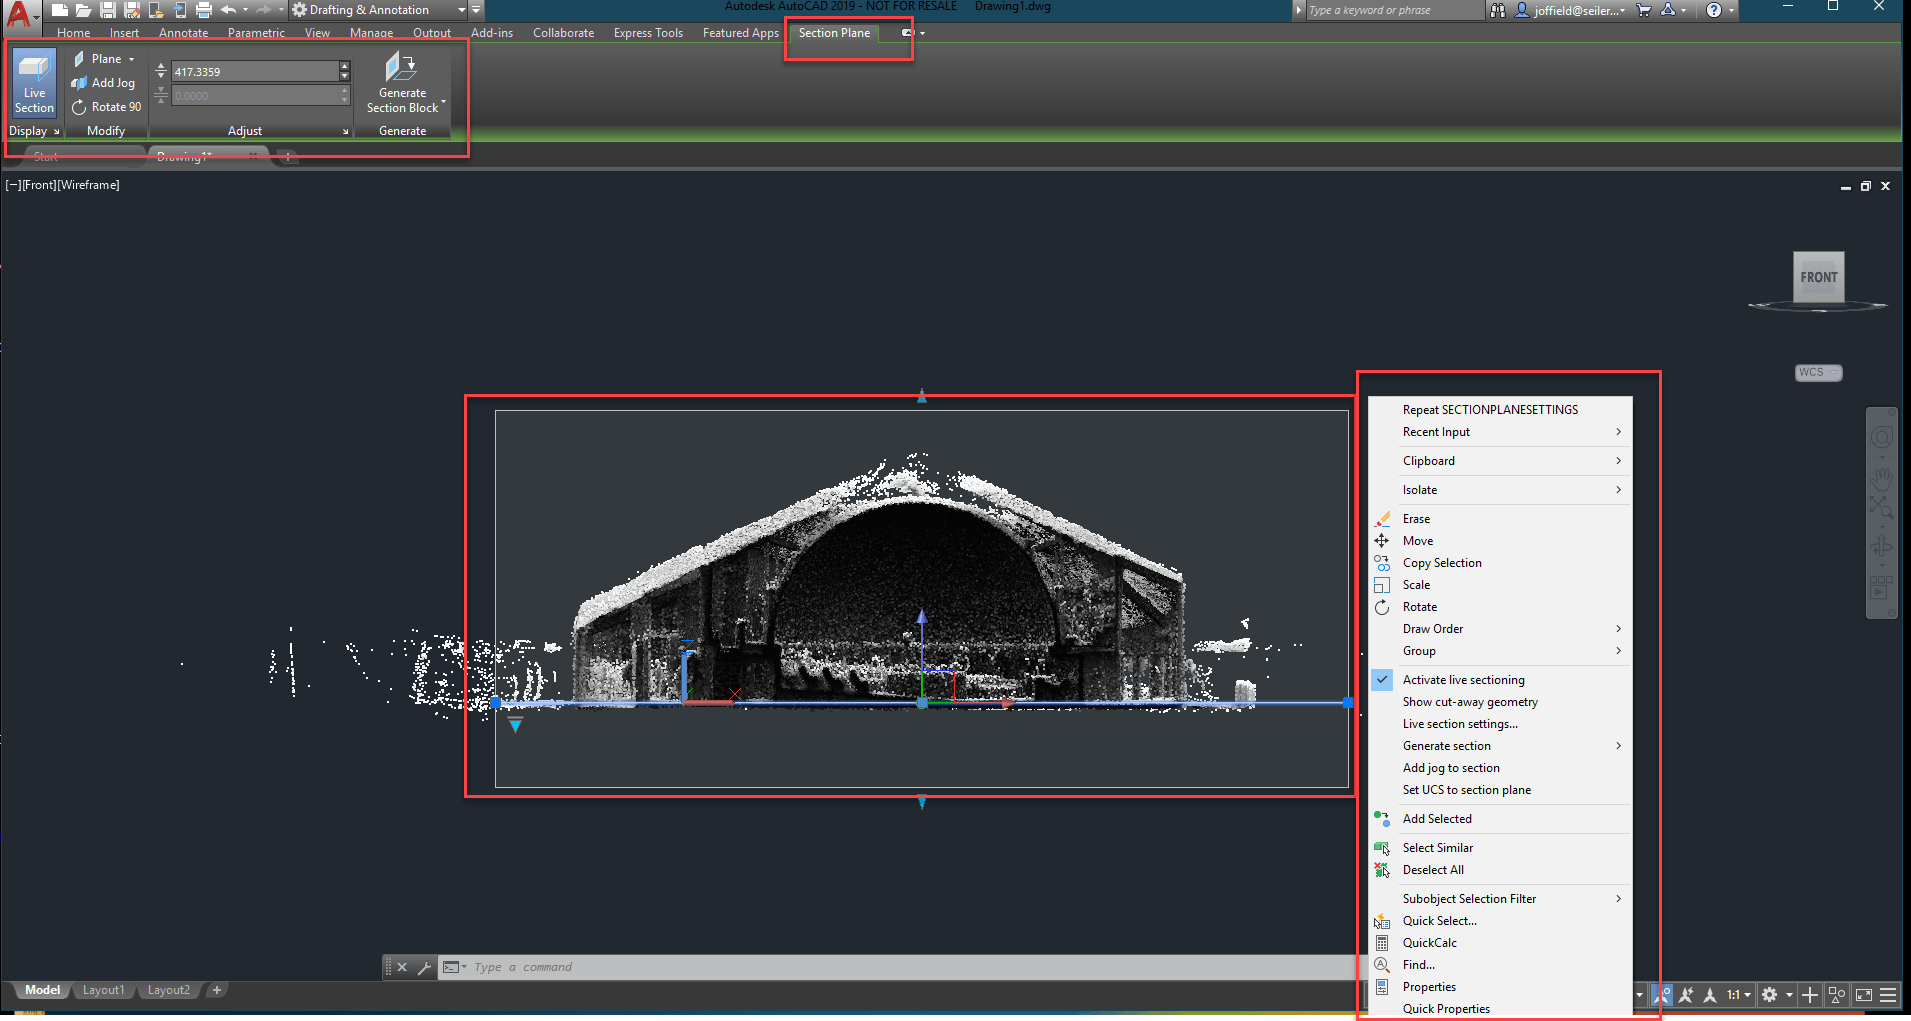
6. Under display of the sectionplane ribbon tab you can adjust settings for your sections (you must select the section box first)

7. You can right click while selecting the section box to adjust the section and several other options

Now you’ve created a quick easy section of your point cloud within ACAD.
Any questions regarding this – Email us at [email protected] or call direct at 636-923-2662

John Offield has over 25 years of experience from Design Build, Engineering and Architectural Firms. John has also been a speaker for the AIA, SMACNA, Structures Congress of Americas, AUGI, CADCAMP, Autodesk events and publications for several Autodesk software over the last 20 years. John has utilized his Design Build, Architectural, MEP, and Structural Design experience with his combined software knowledge / skills to implement BIM into firms small and large. Specialties include workflows between multiple offices and disciplines of BIM / VDC, scanning and hardware, standards, project coordination, and content creation with Revit, Dynamo, Navisworks, and other AEC Autodesk software. John is also an Autodesk Certified Instructor ready to implement custom training and software / hardware workflows. On the personal side, John enjoys spending time with his family, friends, and extended family members (3 dogs), being outdoors working on his farm (fishing, hunting, camping, etc.), gardening, playing guitar, going to concerts.


Leave A Comment