
In a recent support question, a customer asked how they could create a Civil 3D horizontal alignment and profile from a 3D polyline. Looking at the common tools, I realized there was no direct command that would accomplish this. There is a “Create Best-Fit Profile” tool, but there are quite a few input options and requires an already existing alignment and profile view to work. This was not what the customer was after.
There is a way to accomplish this, however, with a commonly overlooked tool: “Quick Profile”. In this post, I’ll guide you through the steps.
1. Convert to Feature Line
First, you must convert the 3D polyline to a feature line by using the Feature Line from Objects command on the “Home” tab of the Civil 3D ribbon. This method assumes the 3D polyline is elevated as you require, so be sure to un-check the box to set elevation.
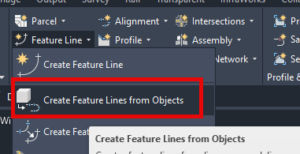
Create Feature Lines from Objects
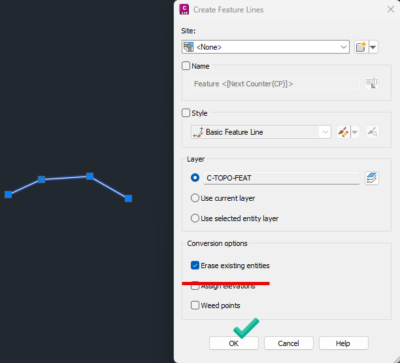
Feature Line Creation Options
2. Quick Profile
After converting to a feature line, select it. In the contextual ribbon for the feature line, choose the Quick Profile command in the upper right. This will create a quick profile which will create a temporary internal alignment and profile for visualization. Don’t worry too much about the visualization style, you just need this object for the next step.
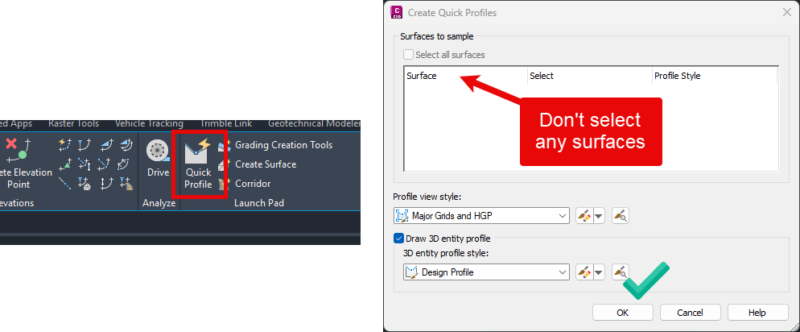
Quick Profile

Caution: If you save the drawing or exit and re-open, this quick profile will disappear.
3. Export LandXML
Next you will export this to a LandXML file using the “Export to LandXML” command in the “Output” tab of the ribbon. This is where the magic happens.
Clear all the selected objects to be exported and then add the quick profile into the list. The quick profile will not appear in the list of objects available, instead you must click on the select object button in the export dialog and select the quick profile in the profile view. It will seem that nothing is selected, but it will be invisibly added to the export list. Save your LandXML file.
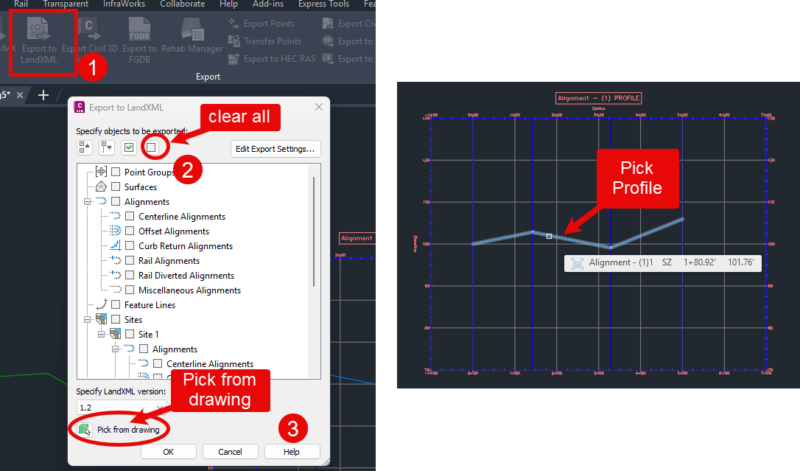
Export LandXML Selection
You are now safe to save or exit the drawing and remove the quick profile, we are finished with it.
4. Import LandXML File
The final step is to import the LandXML file you just exported using the command in the “Insert” tab of the ribbon. This will bring in a Civil 3D alignment and profile into your drawing that was created from the 3D polyline. You can then re-name it and display as you normally would.
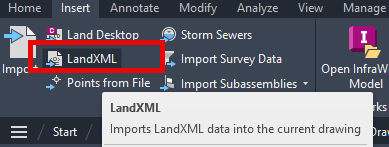
Import LandXML
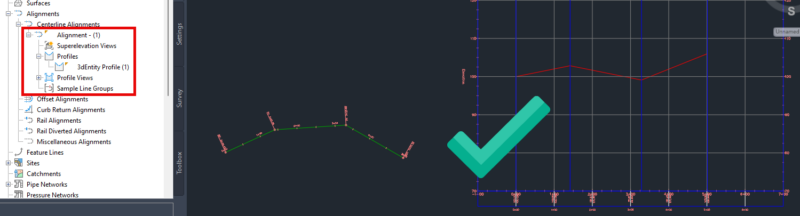
Imported LandXML Data
I hope this little tip helps. If you have any questions, please contact us at [email protected]
Have a great day!
Leave A Comment