

An Important Step when Exporting Profiles in Bluebeam Revu
Today, I want to cover the steps for exporting your saved Profiles in Bluebeam Revu 21. Perhaps you want to take your settings and workspace layout to a new machine. Or, maybe a coworker really favors some changes you’ve made to your profile and you want to share it with them. This post will cover the steps necessary for exporting and importing a profile from Bluebeam Revu. And I’ll also be including an important detail that you do not want to miss when doing this process.
Let’s begin with the Import process first.
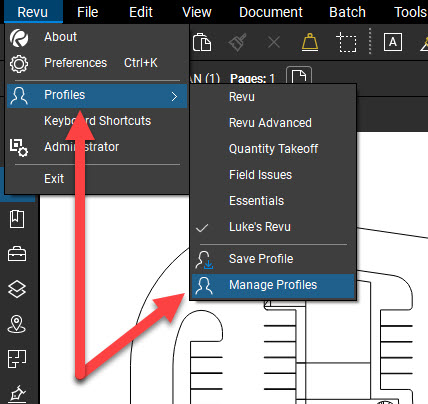
- Head to Revu > Profiles > Manage Profiles
- Click on Import
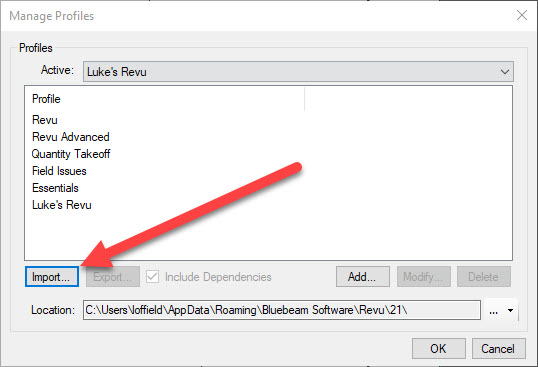
- Next, you’ll be asked to navigate to where the saved Profile (.bpx file) is located.
- Revu will import the profile and make it your new, active profile.
Now, let’s get into the Export Profile steps.
- Again, go to Revu > Profiles > Manage Profiles
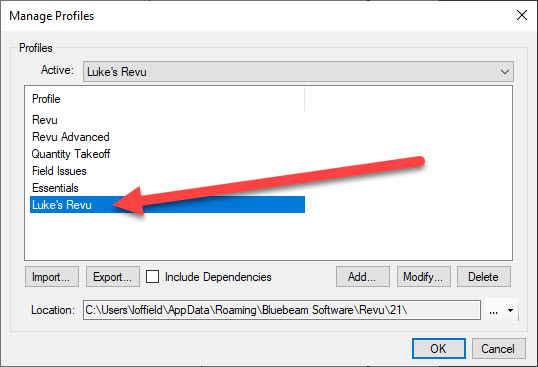
- Highlight the Profile you wish to export.
And here comes the important part…
- Before you click OK, make sure you check the Include Dependencies box!
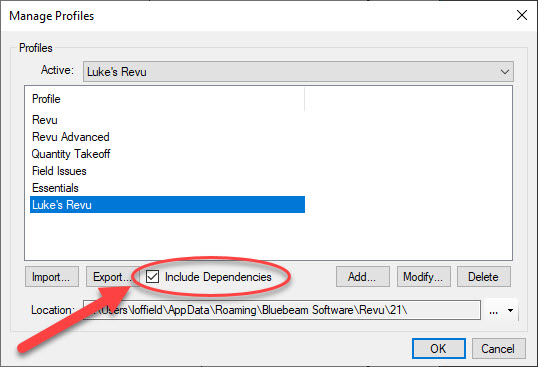
- When this box is checked, it will ensure that the exported .bpx file will include tool sets, bookmarks, hatch patterns, and line styles that are saved in the profile. Basically, all the important stuff.
- After you click OK, you’ll be asked to choose where the Profile file will be saved.
There you have it! There’s not really much to the process beyond these steps. I just wanted to make sure I highlighted the Include Dependencies box and how it ensures those key items are also saved as part of the exported profile.
If you want more details about transferring profiles and other settings, check out this Bluebeam Help Page. Also, be sure to check out my post about Bluebeam’s Area Cutout Tools.
Thanks for reading!
-Luke
![]()
Leave A Comment