I have another video out there that shows a couple other ways to Turn on Toolbars in AutoCAD, so please feel free to check that out. There was a question left in the comments, so I figured I would show another option to get your Toolbars in AutoCAD.
There is yet another way to turn on your Toolbars: the Customize User Interface (CUI) window. There is so much that the CUI can do, so please proceed with caution, as you can change default items. There are several ways to get to this, as there are usually several ways to do anything in AutoCAD.
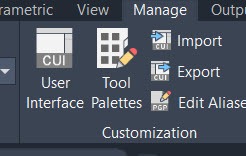
You can click thru the CUI button on the Manage Ribbon.
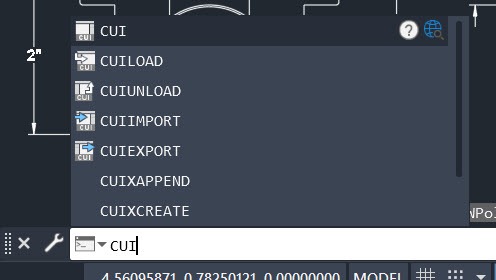
You can type in “CUI” in the command line.
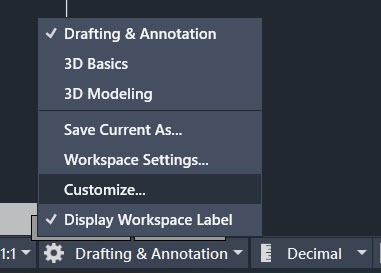
You can also click the dropdown (drop-up??) at the bottom right of your window, the one used to switch between Workspaces, then click Customize.
Each of the three ways will get you to the Customize User Interface window.
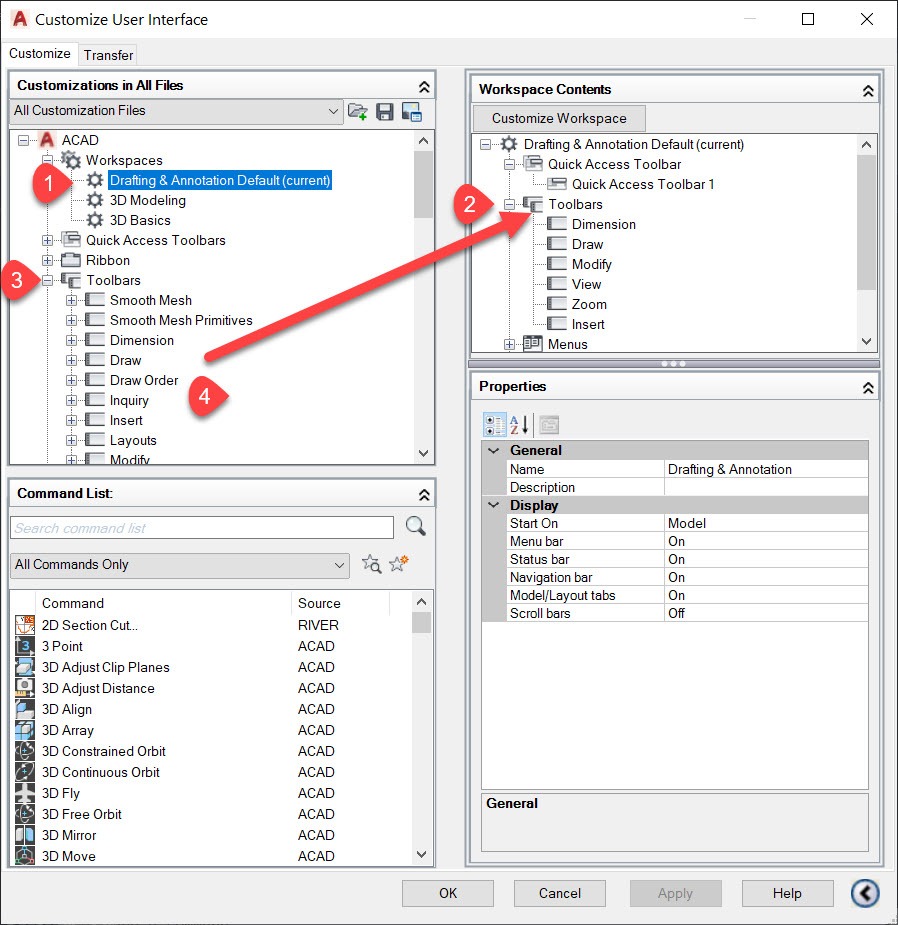
- In the upper LEFT window, Left Click to Select the workspace you want to customize.
- In the upper RIGHT window, Left Click the + next to the “Toolbars” title to open up the list. (Optional, only if there are Toolbars already turned on.)
- In the upper LEFT window, Left Click the + next to the “Toolbars” title to open up the list. These are all the available Toolbars in AutoCAD.
- In the upper LEFT window, Locate the Toolbar you want to add to your User Interface in the Toolbar section. Left Click-Drag that Toolbar into the upper RIGHT window and Drop it onto the “Toolbars” title. (If you are able to do #2, then you can place the Toolbar into the list on the RIGHT where you would like it.)
- Rinse and Repeat Step 4 for all the Toolbars you may want.
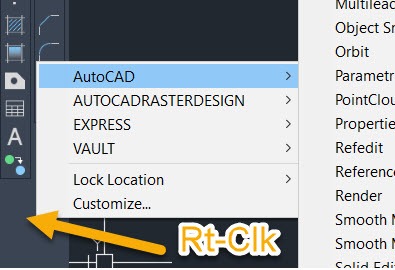
FYI: If you already have a toolbar docked in your workspace, you can Right-Click in the blank space in the border next to the existing toolbar to add more.
I really hope this adds to your understanding and helps out.


Leave A Comment